
Spring Data JPA - Custom QueryDSL Repository 만들기
Spring Data JPA를 사용한다면 JpaRepository를 상속한 repository를 만들고 미리 정해진 키워드 들을 사용하여 메소드(쿼리)를 사용하곤 합니다.
그러나 메소드의 길이가 길어진다면 (findByNameAndAgeAndGenderAndPhoneNumberAnd…) 여간 보기싫은게 아닙니다. 물론 @Query어노테이션을 사용하여 직접 쿼리를 작성할 수 있지만 sql을 직접 작성해야 한다는 단점이 존재합니다.
또한 QueryDSL을 사용하고자 한다면 이를 사용할 계층이 필요합니다. service 계층에 관련 메소드를 작성할 수도 있겠지만 설계 측면에서 봤을때 쿼리는 repository 계층에서 작성하는게 좋겠죠.
Customizing Individual Repositories
개별 repository를 확장하고 필요한 쿼리를 작성하기 위해(Query DSL을 사용하기 위해) 새로운 커스텀 클래스가 필요합니다. 다행히 Spring Data JPA 공식문서에는 관련 내용과 적용 방법이 자세히 적혀 있습니다.
커스텀 인터페이스를 만들고 해당 인터페이스를 구현하는 클래스를 만든 후에 기존 repository가 커스텀 인터페이스를 상속하게 하면 된다고 하네요.
1
2
3

// 기존 repository
public interface CustomerRepository extends JpaRepository<Customer, UUID> {
}
1
2
3
4

// custom interface
public interface CustomCustomerRepository {
    List<Customer> findVIPCustomer();
}
1
2
3
4
5
6
7
8
9
10
11
12
13
14
15

// custom interface를 구현하는 클래스
@Component
public interface CustomCustomerRepositoryImpl implements CustomCustomerRepository {

    @PersistenceUnit
    EntityManagerFactory emf;

    @Autowired
    JPAQueryFactory queryFactory;

    @Override
    List<Customer> findVIPCustomer() {
        ...
    }
}
1
2
3

// 기존 repository 수정
public interface CustomerRepository extends JpaRepository<Customer, UUID>, CustomCustomerRepository {
}
보통은 위와같이 인터페이스, 클래스를 작성하여 repository를 확장해서 사용하며 QueryDSL이 필요한 경우 JPAQueryFactory를 주입받아 사용하곤 합니다.
공식 문서에 의하면 custom interface를 구현하는 클래스는
Impl을 접미사로 붙여야 한다고 나와 있습니다. @EnableJpaRepositories(repositoryImplementationPostfix = “MyPostfix”) 어노테이션을 사용하면 접미사를 변경할 수도 있습니다.
QueryDSL을 모듈화하여 공통으로 사용하기
QueryDSL을 사용한다면 뭔가 아쉽습니다. 동일한 형태의 인터페이스, 클래스를 repository마다 만들어서 보일러플레이트 코드가 늘어나기 때문입니다.
Spring Data JPA는 이때 사용할 수 있는 QuerydslPredicateExecutor 라는 인터페이스를 제공합니다.
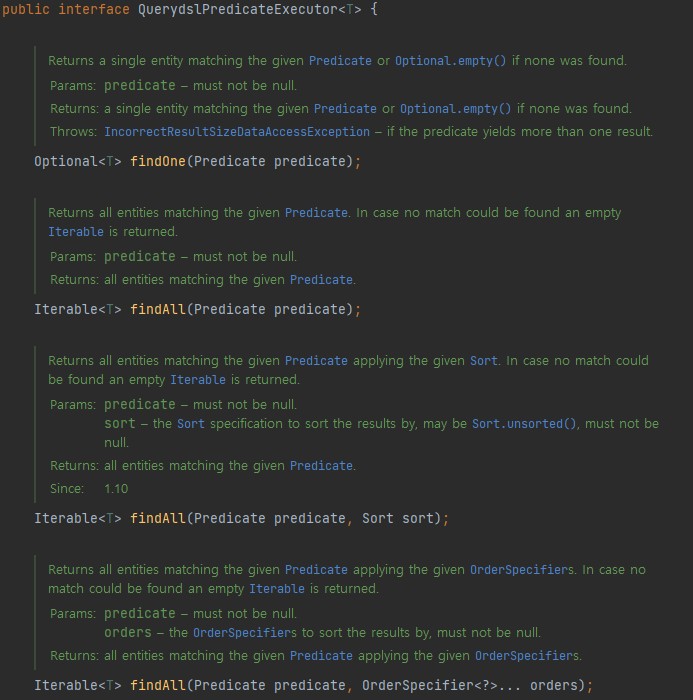
하지만 해당 인터페이스를 살펴보면 조회 결과를 DTO로 반환하거나 명시적 join을 사용할 수 없다는 단점이 존재합니다. QuerydslRepositorySupport 추상클래스를 상속하여 사용하는 방법도 있지만 해당 방법도 한계는 존재합니다.
이러한 단점들을 극복한 CustomRepository를 만들어 보고자 합니다. 기존의 JpaRepository처럼 인터페이스 상속만으로 사용 가능하게 하는것이 목표입니다.
1
2
3
4

@FunctionalInterface
public interface QueryHandler {
    JPAQuery<?> apply(JPAQuery<?> query);
}
1
2
3
4
5
6
7
8
9

public interface CustomJpaSearchQuery<T> {
    List<T> findList(Predicate predicate, QueryHandler queryHandler, Sort sort);

    Page<T> findPage(Predicate predicate, QueryHandler queryHandler, Pageable pageable);

    <P> List<P> selectList(Predicate predicate, Class<P> type, Map<String, Expression<?>> bindings, QueryHandler queryHandler, Sort sort);

    <P> Page<P> selectPage(Predicate predicate, Class<P> type, Map<String, Expression<?>> bindings, QueryHandler queryHandler, Pageable pageable);
}
구현해야할 인터페이스는 위와 같습니다. 조회 결과를 entity 타입으로 받거나 Projection(DTO)으로 받을 수 있는 메소드 들입니다. 페이징도 지원합니다.
1
2
3
4
5
6
7
8
9
10
11
12
13
14
15
16
17
18
19
20
21
22

public class DefaultCustomJpaSearchQuery<T> implements CustomJpaSearchQuery<T> {

    private final EntityManager entityManager;
    private final JPAQueryFactory queryFactory;
    private final EntityPath<T> path;

    // querydsl-apt 에 의해 생성된 q 클래스가 존재할 경우 -> path로 q 클래스 사용
    public DefaultCustomJpaSearchQuery(JpaEntityInformation<T, ?> entityInformation, EntityManager entityManager) {
        this.entityManager = entityManager;
        this.queryFactory = new JPAQueryFactory(entityManager);
        this.path = SimpleEntityPathResolver.INSTANCE.createPath(entityInformation.getJavaType());
    }

    // 생성된 q 클래스가 없거나 이를 사용할 수 없는 경우 (ex. unit test) - 새로운 entity path 생성
    public DefaultCustomJpaSearchQuery(Class<T> type, EntityManager entityManager) {
        this.entityManager = entityManager;
        this.queryFactory = new JPAQueryFactory(entityManager);
        this.path = new EntityPathBase<>(type, "entity");
    }

    ...
}
CustomJpaSearchQuery를 구현한 클래스입니다. JpaQueryFactory와 EntityPath를 클래스 생성 시점에 정의하였습니다. 메소드들은 글이 너무 길어지기 때문에 포함하지 않았습니다. 전체 코드는 블로그 하단의 링크에서 확인하실 수 있습니다.
다음으로 CustomJpaSearchQuery 인터페이스를 확장하는 인터페이스를 만들어줍니다. 이 인터페이스는 CustomJpaSearchQuery 뿐만 아니라 JpaRepository인터페이스도 확장하여 기존의 기능을 사용할 수 있는 인터페이스 입니다.
1
2
3

@NoRepositoryBean
public interface CustomJpaQueryDSLRepository<T, ID> extends JpaRepository<T, ID>, CustomJpaSearchQuery<T> {
}
@NoRepositoryBean 어노테이션을 붙여 최종적으로 생성되는 repository에 @Repository 어노테이션을 붙이지 않아도 동작하도록 하였습니다.
위 인터페이스는 한가지 문제가 있습니다. 기본적으로 repository의 구현체는 JpaRepositoryFactoryBean 에 의해 결정되는데 아무런 설정도 하지 않았기 때문에 위에서 만든 구현체는 당연히 repository의 구현체로서 인식(동작)하지 않습니다. 이 구현체를 인식하게 하기 위해서는 Custom Factory Bean이 필요합니다.
1
2
3
4
5
6
7
8
9
10
11
12
13
14
15
16
17
18
19
20
21
22
23
24
25
26
27
28
29
30
31
32
33
34
35

public class CustomJpaQueryDSLRepositoryFactory<T extends Repository<E, ID>, E, ID> extends JpaRepositoryFactoryBean<T, E, ID> {
    public CustomJpaQueryDSLRepositoryFactory(Class<? extends T> repositoryInterface) {
        super(repositoryInterface);
    }

    @Override
    protected RepositoryFactorySupport createRepositoryFactory(EntityManager entityManager) {
        return new QueryDSLRepositoryFactory(entityManager);
    }

    private static class QueryDSLRepositoryFactory extends JpaRepositoryFactory {
        private final EntityManager entityManager;

        public QueryDSLRepositoryFactory(EntityManager entityManager) {
            super(entityManager);
            this.entityManager = entityManager;
        }

        @Override
        protected RepositoryComposition.RepositoryFragments getRepositoryFragments(RepositoryMetadata metadata) {
            var fragments = super.getRepositoryFragments(metadata);

            if (CustomJpaQueryDSLRepository.class.isAssignableFrom(metadata.getRepositoryInterface())) {
                var impl = super.instantiateClass(
                        DefaultCustomJpaSearchQuery.class,
                        this.getEntityInformation(metadata.getDomainType()), this.entityManager
                );

                fragments = fragments.append(RepositoryFragment.implemented(impl));
            }

            return fragments;
        }
    }
}
Bean이 생성되는 시점에 repository를 검색하여 만약 repository가 CustomJpaQueryDSLRepository 인터페이스를 확장하고 있다면 DefaultCustomJpaSearchQuery 클래스를 인터페이스의 구현체로 지정하고 repository 로써 동작하게 하는 Custom Factory Bean 클래스 입니다.
이제 Custom Factory Bean 클래스를 사용하겠다고 선언만 하면 됩니다.
1
2
3
4
5

@SpringBootApplication
@EnableJpaRepositories(repositoryFactoryBeanClass = CustomJpaQueryDSLRepositoryFactory.class)
public class SpringBootApplication {
    ...
}
설정은 모두 끝났습니다. CustomJpaQueryDSLRepository를 상속하여 사용하면 끝입니다. 당연히 기존처럼 메소드 기반으로 쿼리를 생성하여 사용할 수도 있습니다.
1
2
3

public interface OrderRepository extends CustomJpaQueryDSLRepository<Product, UUID> {
    List<Order> findByProductPriceGreaterThanOrderByNameDesc(Long price);
}
아래는 사용 예시 입니다.
1
2
3
4
5
6
7
8
9
10
11
12
13
14
15
16
17
18
19
20
21
22
23
24
25
26
27
28
29
30
31
32


private Map<String, Expression<?>> buildBindings() {
    var oq = QOrder.order;
    var cq = QCustomer.customer;
    var bindings = new HashMap<String, Expression<?>>();

    bindings.put("id", oq.id);
    bindings.put("name", oq.name);
    bindings.put("dtCreatedAt", oq.dtCreatedAt);

    bindings.put("customerId", cq.id);
    bindings.put("customerName", cq.name);
    bindings.put("customerAge", cq.age);
    bindings.put("customerGender", cq.gender);

    return bindings;
}

private void select() {
    var predicate = new BooleanBuilder();
    predicate.and(oq.product.price.gt(3000L));

    var customRepositorySelectList = orderRepository.selectList(
            predicate,
            OrderDTO.class,
            this.buildBindings(),
            query -> query.leftJoin(cq).on(cq.id.eq(oq.customerId)),
            new QSort(oq.name.desc())
    );

    ...
}