
Terraform으로 AWS 무중단 배포 인프라 구성하기
Terraform으로 AWS ECS 무중단 배포 인프라 구성하기 - 5. 운영환경 (프론트)
프론트 운영환경을 구축한다.
리소스
1. S3 버킷
먼저 S3 버킷을 생성한다.
1
2
3
4
5
6
7
8
9
10
11
12
13
14
15
16
17
18
19
20
21
22
23
24
25
26
27
28
29
30
31
32
33
resource "aws_s3_bucket" "app-prod-react" {
  bucket = "app-prod-react"

  tags = {
    Name = "app-prod-react"
  }
}

resource "aws_s3_bucket_ownership_controls" "app-prod-react-ownership" {
  bucket = aws_s3_bucket.app-prod-react.id
  rule {
    object_ownership = "BucketOwnerPreferred"
  }
}

resource "aws_s3_bucket_acl" "app-prod-react-acl" {
  depends_on = [aws_s3_bucket_ownership_controls.app-prod-react-ownership]

  bucket = aws_s3_bucket.app-prod-react.id
  acl    = "private"
}

resource "aws_s3_object" "app-prod-react-admin" {
  bucket = aws_s3_bucket.app-prod-react.id
  content_type = "application/x-directory"
  key = "admin/"
}

resource "aws_s3_object" "app-prod-react-user" {
  bucket = aws_s3_bucket.app-prod-react.id
  content_type = "application/x-directory"
  key = "user/"
}
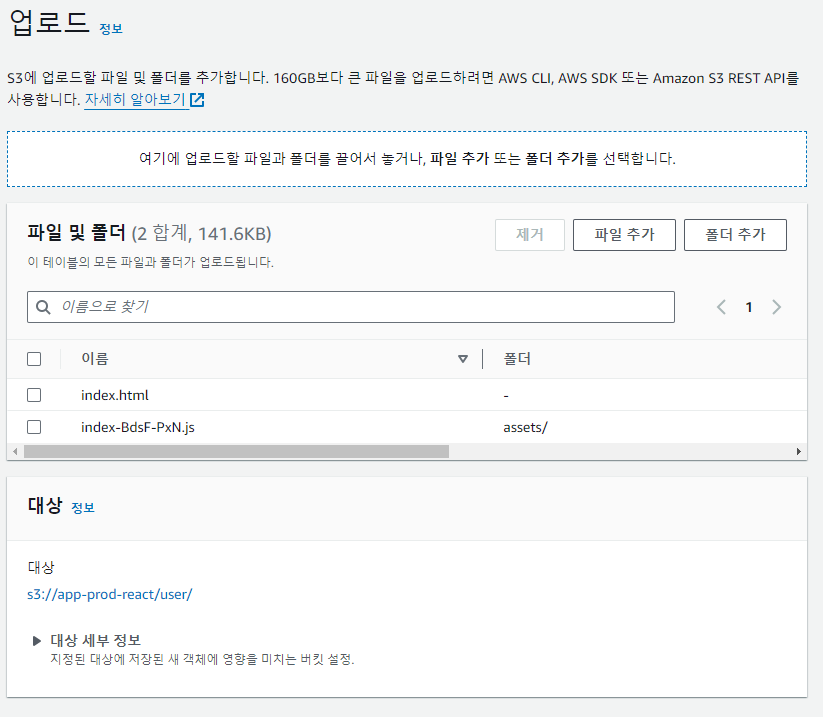
버킷과 엑세스 제어 목록, 관리자와 유저 어플리케이션이 배포될 폴더를 정의했다.
관리자와 유저 어플리케이션을 업로드해 둘 것이다. 이 또한 terraform으로 진행이 가능하지만, 어짜피 앱 배포는 추후 github action을 통해 빌드하고 s3에 업로드할 것이므로 지금은 콘솔 환경에서 직접 업로드 한다.
이 상태에서 버킷을 퍼블릭 액세스로 열어버리고 주소로 접근하면 웹 페이지가 뜬다. 그러나 앞단에 CloudFront를 두어 그곳에서 s3로 라우팅할 것이기 때문에 넘어간다.
2. CloudFront
1
2
3
4
5
6
7
8
9
10
11
12
13
14
15
16
17
18
19
20
21
22
23
24
25
26
27
28
29
30
31
32
33
34
35
36
37
38
39
40
41
42
43
44
45
46
47
48
49
50
51
52
53
54
55
56
57
58
59
60
61
62
63
resource "aws_cloudfront_origin_access_control" "admin-front" {
  name                              = "admin-front"
  description                       = "admin front"
  origin_access_control_origin_type = "s3"
  signing_behavior                  = "always"
  signing_protocol                  = "sigv4"
}

resource "aws_cloudfront_distribution" "admin-distribution" {
  origin {
    domain_name = aws_s3_bucket.app-prod-react.bucket_regional_domain_name
    origin_id   = aws_s3_bucket.app-prod-react.id
    origin_access_control_id = aws_cloudfront_origin_access_control.admin-front.id
    origin_path = "/admin"
  }

  enabled = true
  default_root_object = "index.html"
  comment = "admin distribution"

  aliases = ["app-admin.keencho.com"]

  default_cache_behavior {
    allowed_methods        = ["GET", "POST", "PUT", "OPTIONS", "DELETE", "PATCH", "HEAD"]
    cached_methods         = ["GET", "HEAD"]
    target_origin_id       = aws_s3_bucket.app-prod-react.id

    forwarded_values {
      query_string = false

      cookies {
        forward = "none"
      }
    }

    viewer_protocol_policy = "redirect-to-https"
    min_ttl = 0
    default_ttl = 3600
    max_ttl = 86400
  }

  price_class = "PriceClass_100"

  restrictions {
    geo_restriction {
      restriction_type = "whitelist"
      locations        = ["KR"]
    }
  }

  viewer_certificate {
    acm_certificate_arn = aws_acm_certificate.ssl-certificate-virginia.arn
    ssl_support_method = "sni-only"
    minimum_protocol_version = "TLSv1.2_2021"
  }

  custom_error_response {
    error_code = 403
    error_caching_min_ttl = 10
    response_page_path = "/index.html"
    response_code = 200
  }
}
관리자 배포를 생성했다. 대체 도메인을 지정할 경우 SSL 인증서는 필수인데, 앞서 말했던 것처럼 여기엔 us-east-1 리전에 존재하는 인증서만 지정할 수 있다.
현 시점엔 라우팅되는 모든 트래픽이 s3 버킷의 /admin 폴더로 전송된다.
1
2
3
4
5
6
7
8
9
10
11
resource "aws_route53_record" "app-admin" {
  zone_id = aws_route53_zone.keencho.id
  name    = "app-admin.keencho.com"
  type    = "A"

  alias {
    name                   = aws_cloudfront_distribution.admin-distribution.domain_name
    zone_id                = aws_cloudfront_distribution.admin-distribution.hosted_zone_id
    evaluate_target_health = true
  }
}
Route 53 레코드를 생성하여 app-admin.keencho.com 으로 들어오는 요청이 CloudFront로 라우팅 되도록 하였다. 사용자(user) 배포도 이름만 바꾸어 생성한다.
S3 버킷 정책 변경
현재 S3 버킷 정책은 아래 이미지와 같이 모든 퍼블릭 엑세스가 차단되어 있을 것이다.
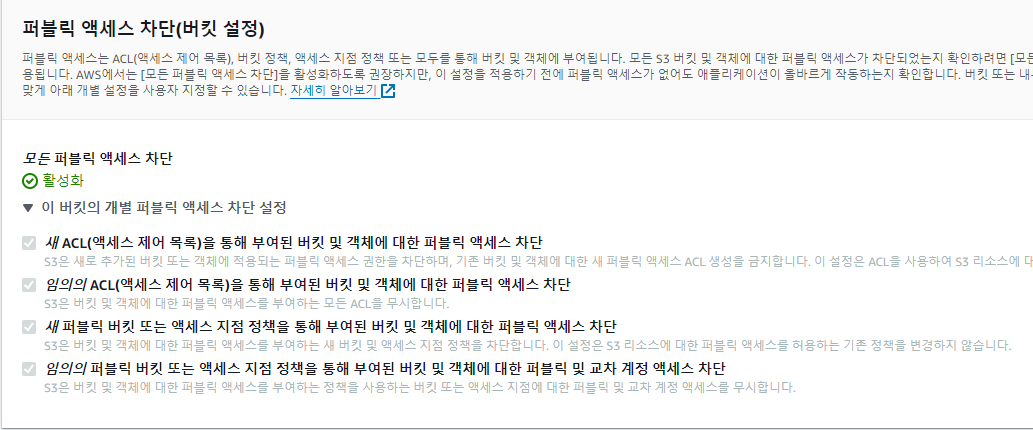
CloudFront 에서 온 요청은 허용하는 정책을 적용한다.
1
2
3
4
5
6
7
8
9
10
11
12
13
14
15
16
17
18
19
20
21
22
23
24
25
26
resource "aws_s3_bucket_policy" "allow-from-cloudfront-policy" {
  bucket = aws_s3_bucket.app-prod-react.id

  policy = jsonencode({
    Version = "2012-10-17",
    Statement = [
      {
        Sid      = "AllowCloudFrontServicePrincipal",
        Action   = "s3:GetObject",
        Effect   = "Allow",
        Resource = "${aws_s3_bucket.app-prod-react.arn}/*",
        Principal = {
          "Service": "cloudfront.amazonaws.com"
        },
        Condition = {
          StringEquals = {
            "AWS:SourceArn": [
              aws_cloudfront_distribution.admin-distribution.arn,
              aws_cloudfront_distribution.user-distribution.arn,
            ]
          }
        }
      }
    ]
  })
}
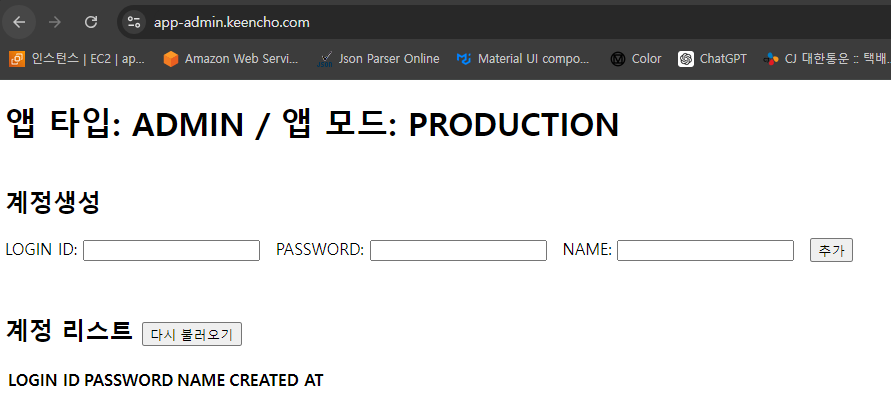
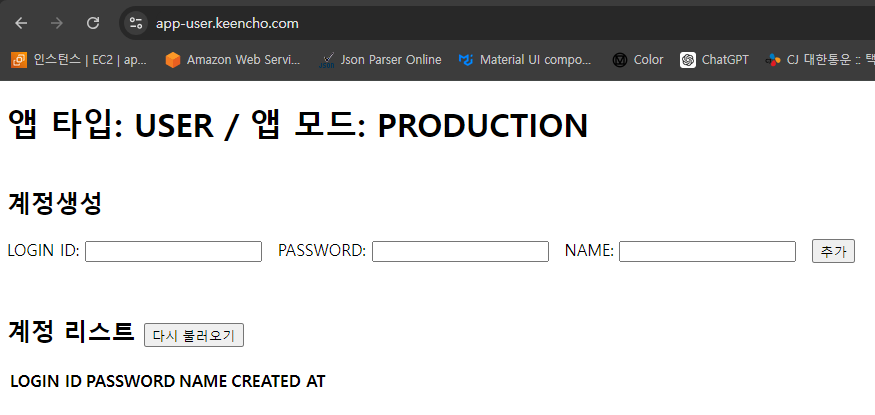
도메인으로 접속했을 때 의도한대로 페이지가 동작하는지 확인하자.
3. Github Actions 배포 스크립트 작성
react 프로젝트 구조이다. root 폴더에서 npm install 명령어를 수행한 후 각 admin, user 폴더에서 빌드를 수행해야 한다.
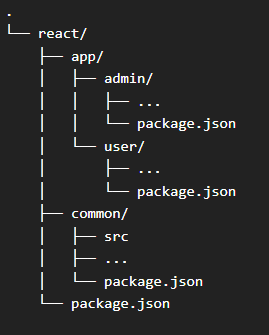
다음은 Github Actions 배포 스크립트이다. 앞서 설명한대로 install 과 build를 수행한 후 S3에 업로드한다. 이때 기존 파일은 모두 삭제한다. 물론 실제 운영환경에선 따로 백업해두는게 안전하다.
그 후 CloudFront Invalidate 를 통해 캐싱된 파일을 무효화 하여 사용자가 배포된 파일을 확인할 수 있게 한다.
1
2
3
4
5
6
7
8
9
10
11
12
13
14
15
16
17
18
19
20
21
22
23
24
25
26
27
28
29
30
31
32
33
34
35
36
37
38
39
40
41
42
43
44
45
46
47
48
49
50
name: Deploy Admin and User to S3

on:
  workflow_dispatch:

jobs:
  deploy:
    name: Deploy
    runs-on: ubuntu-latest

    steps:
      - name: Check out the repository
        uses: actions/checkout@v4

      - name: Set up Node.js
        uses: actions/setup-node@v3
        with:
          node-version: '20'

      - name: Install dependencies for Root Project
        working-directory: react
        run: npm install

      - name: Build Admin
        working-directory: react/app/admin
        run: npm run build:production

      - name: Build User
        working-directory: react/app/user
        run: npm run build:production

      - name: Configure AWS credentials
        uses: aws-actions/configure-aws-credentials@v2
        with:
          aws-access-key-id: ${{ secrets.AWS_ACCESS_KEY_ID }}
          aws-secret-access-key: ${{ secrets.AWS_SECRET_ACCESS_KEY }}
          aws-region: ${{ secrets.AWS_REGION }}

      - name: Remove Exist & Upload New to S3
        working-directory: react
        run: |
          aws s3 rm s3://${{ secrets.S3_BUCKET_NAME }}/admin --recursive
          aws s3 rm s3://${{ secrets.S3_BUCKET_NAME }}/user --recursive
          aws s3 cp app/admin/dist s3://${{ secrets.S3_BUCKET_NAME }}/admin --recursive
          aws s3 cp app/user/dist s3://${{ secrets.S3_BUCKET_NAME }}/user --recursive

      - name: Invalidate CloudFront
        run: |
          aws cloudfront create-invalidation --distribution-id ${{ secrets.AWS_CLOUDFRONT_DISTRIBUTION_ID_ADMIN }} --paths "/*"
          aws cloudfront create-invalidation --distribution-id ${{ secrets.AWS_CLOUDFRONT_DISTRIBUTION_ID_USER }} --paths "/*"